Showing posts with label Little Bits of Quilty Goodness. Show all posts

Wednesday, June 6, 2012

Birthday Bag of Bags


Some time ago I made my daughter a set of rainbow bean bags.  I actually made two sets, and tucked one away for a future occasion.  A recent invitation to a neighbor's birthday party provided the opportunity to get out the bags, fill them up, and get them ready for a very special little girl.


These were so much fun to make.  They are a great scrap buster too!  My older boys enjoy them as much as my four year old.  There's something satisfying about tossing bean bags.  :-)


I used some scraps from my Valentine's quilt to make a drawstring holding bag.  This was my very first drawstring bag, but it certainly won't be my last!


What a quick and easy (and incredibly useful!) project.  I loved making this.  It is fully lined, with a squared off bottom.  I googled for tutorials on drawstring bags and combined several techniques to come up with my own pattern.  It is incredibly easy to do.


A perfect gift bag for a special homemade gift!


Sunday, May 20, 2012

A Birthday Bag

I bought two charm packs of Lily Ashbury's new line called Tradewinds for a quilt.  The minute my daughter saw them she begged for me to repurpose them into tote bags.  The bright colors and bold patterns in this line are just like that....love at first sight that demands instant use!


The color scheme is a departure from my norm, but these brights are so much fun to work with.  I used a simple market tote pattern; very basic with straight line quilting, a boxed bottom, quilted handles, and a small pocket in the lining.


We found the bling at Joann's - two for one, no less - so I'm obligated to make the second tote.  :-)


This one was for my daughter to give to a friend on her 19th birthday.  The report was that she liked it a lot.  It makes me so happy when my kids and their friends appreciate the homemade stuff.  Now I have to make the second tote for my daughter.  Hers will have a paler color for the lining. I  have it all layed out on my sewing table....just need to get to work.

Then I also need to go buy two more charm packs so I can have them on hand for their originally intended purpose!  :-)


Saturday, May 19, 2012

Mother's Day

Mother's Day broght a little crafting this year.  I made an ipad case for my Mom.


I put a quilted pocket on the front to hold her charger.


My favorite part.  :-)
I think I need to start adding tags to everything.


I didn't have a pattern for this...I just made it up based on a basic zipper pouch concept.


I also made a set of tissue covers.  One for each lady at our mother's day luncheon.
I followed the quick and easy tutorial from The Cottage Mama.


They were fun to make, and practical too!


Paired with a pack of pocket tissues, they made a fun and quirky gift, considering there are lots of spring sneezes this year in the south!  


Saturday, May 12, 2012

Star Spangled Table Runner

There is a church around the corner from where we live that offers an amazing music program for children.  My son has participated in choir there for the past two years with several of his friends.  This week was their huge spring performance....a circus theme, and my son played a clown.

The woman who directs the youth choir is a talented, generous, patient soul who my son adores!  This week marked her 20th anniversary of working with the children at this church.


My son wanted to do something special for her to mark the occasion.  I've never even met the woman face to face, let alone knowing anything about her color schemes or decorating preferences.  In situations like that, I find that going seasonal is pretty safe.  I figure even if people aren't into "crafty" or "homemade", maybe they would display a seasonal item briefly each year?

So I decided to go summer-y with red, white, and blue.

I found this pattern for free online by doing a google search for quilted table runners.  (Sorry!  I can't seem to find the link again.)  The pattern called for only ten blocks, which was super small, so I added five more.  Honestly, I would have liked it to be even bigger, but I had a major time constraint.  So, this is more of a topper than a runner.  Maybe that will give her more options for places to put it?


I really like the play of color and design, both of which are on a very petite scale.


This is where I got a little greedy.  I purchased fat quarters for this project, and when it started coming together I really liked it.  

A lot.

So much so, that I abandoned my original plan of using my left overs for backing because I wanted to hoard the fabric and make a second topper for myself.  (blush)

Instead, I pulled this small print from my stash and simplified my design for the backing.


The verse Hannah chose for this project is Exodus 15:1
"I will sing to the Lord,
for He is highly exalted."

Perfect for a choir teacher, right?  ("C9" is her signature.)


We purchased a mason jar, some red marbles, a patriotic bow, and a bunch of carnations to include with the gift.  My son went out and gathered some greenery to add to the fullness of the bouquet.


It makes me really happy that my pre-teen considers something homemade to be a special way to honor someone he loves.  He thanked me many times for taking the time to do this for his teacher.  I hope he doesn't outgrow his appreciation for simple, homemade art!  :-)


Tuesday, April 10, 2012

In a Zip!

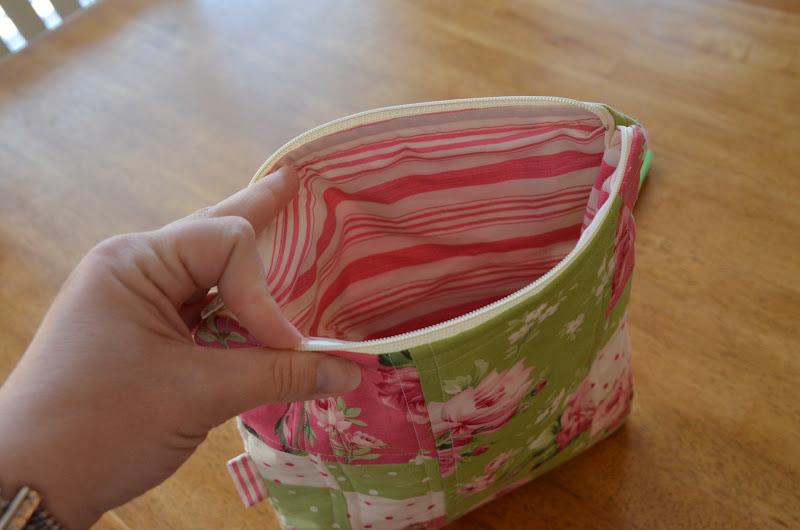
I decided to send a care package of goodies to my college freshman and her room mate, who happen to have birthdays just a few days apart.  I used Randi's tutorial to make fun zipper pouches.


The thought of properly installing a zipper has always given me a case of the vapors.  But when I saw Randi's tutorial, it gave me hope that even I could accomplish this.


And as it turned out, I was turned on to zippers!  Once I started, I was hooked.  These little pouches are sincerely addictive.


Perhaps it has something to do with the fact that they make such great stash busters.


I even decided to "go green" and use color coordinating zips.  Fancy stuff.


I filled them with fun trinkets, including these bird nest pendants that I made.


There are great tutorials on you tube to learn how to make them.


Such a fun little treat to sneak in the mail, and the girls loved receiving them!

Thanks, Randi.  Mission successful!


Sunday, January 29, 2012

Neat as a Pin

Happy Little Cottage made one, and I am grateful to her for providing the link to the tutorial, because the minute I saw hers I became a green eyed monster.


I simply couldn't imagine getting on with my Valentine quilt until my pins had a new, happy, Valentine-y place to live.


This was amazingly fun to make.  And addictive too.  I can see why Happy Little Cottage couldn't stop at just one.  I'm happily flirting with the idea of making a cathedral window pillow.

Someday.  For now, it's back to our previously scheduled Valentine quilt.


A question for those of you who love making pincushions...

What do you like to stuff them with??  I used crushed walnut shells and fiberfill in this one.  I'd like to know what others find works best.

Friday, January 13, 2012

Bobbin Buddy

Amanda Jean made one today, and the minute I saw hers I knew I wanted one.  I'm always inspired by her clever ideas, but I thought she really outdid herself this time.  I had no intention of a project today.  No kidding....I happened to be making an appetizer this afternoon to take to an open house tonight, and the recipe called for a tiny can of olives, exactly like the one she used to make a bobbin holder!  I took it as a sign that it was meant to be.  :-)

I sure hope Amanda Jean considers imitation to be a sincere form of flattery, because I couldn't really think of a way to improve on her perfect design.  In other words, I shamelessly copied!


I'm not the machine quilting diva that she is, so I embroidered my label.  I really LOVED the look of her linen, but I don't own any of that, so I made do with the Kona I had on hand.  I also lined my can with felt so my bobbins don't clang.  (I know.  I couldn't help myself.)


Is this the cutest thing?  Makes me want to go wind a dozen bobbins, just because.

Making one was so much fun....


...they multiplied!


One for me, one for a friend, and one for the sweet lady who is teaching the quilt class I'm attending tomorrow.


I just need to eat two more cans of olives before I head to class!  Ha!


I'm linking up with Amanda's Finish-It-Up-Friday.  
Thanks, Amanda Jean, for a fun Friday project!

Fabric = Verna by Kate Spain for Moda


Monday, December 12, 2011

Christmas Mini Table Runner


It isn't at all unlike me to set aside some could be/should be projects in favor of chasing a creative whim. Such was the case the other night when I sat down at my sewing table, heavily laden with Christmas projects, and spied a small handful of Christmas charms left over from a previous quilt.

Inspiration started flowing and I was helpless to resist.


A few years ago my mother gave me this sweet nativity set for my birthday, and it is one of my very favorite Christmas decorations.  I'm captivated by the sweet innocence of the faces.


This set is "living" atop an old pine cabinet this season; one that isn't particularly attractive.  First I set fake snow beneath my figures, then I tried a holiday placemat.  Nothing was right, so the little figures were just sitting on the naked cabinet.


I decided they needed a cozy place to rest.  One with a little color and sparkle.


I cut my small handful of charms into thirds, and pieced them into strips.


Then I got the idea to make the center piece a little wider, and add a touch of tender embroidery.


I'm quite pleased that my old pine cabinet now has a cozy topper, and that my favorite little Christmas figures rest sweetly on something handmade.


And there is chapter one of why my Christmas sewing isn't getting done very quickly......